添加依赖
<!-- mybatis -->
<dependency>
    <groupId>org.mybatis.spring.boot</groupId>
    <artifactId>mybatis-spring-boot-starter</artifactId>
    <version>1.1.1</version>
</dependency>
<dependency>
    <groupId>mysql</groupId>
    <artifactId>mysql-connector-java</artifactId>
    <scope>runtime</scope>
</dependency>

<!-- datasource pool-->
<dependency>
    <groupId>com.alibaba</groupId>
    <artifactId>druid</artifactId>
    <version>1.0.14</version>
</dependency>
配置数据库连接(application.properties)
#data source
jdbc.driverClassName=com.mysql.jdbc.Driver
jdbc.url=jdbc:mysql://localhost:3306/simulate?zeroDateTimeBehavior=convertToNull&useUnicode=true&characterEncoding=utf-8
jdbc.username=xxxxxx
jdbc.password=xxxxxx

mybatis.typeAliasesPackage=com.gemantic.*.model
mybatis.mapperLocations=classpath:mapper/*.xml
mybatis.typeAliasesPackage:指定domain类的基包,即指定其在*Mapper.xml文件中可以使用简名来代替全类名(看后边的UserMapper.xml介绍)mybatis.mapperLocations:指定*Mapper.xml的位置
Mybatis与Spring Boot集成
package com.gemantic.config;

import com.alibaba.druid.pool.DruidDataSourceFactory;
import org.apache.ibatis.session.SqlSessionFactory;
import org.mybatis.spring.SqlSessionFactoryBean;
import org.mybatis.spring.annotation.MapperScan;
import org.springframework.beans.factory.annotation.Autowired;
import org.springframework.context.annotation.Bean;
import org.springframework.core.env.Environment;
import org.springframework.core.io.support.PathMatchingResourcePatternResolver;
import org.springframework.stereotype.Component;

import javax.sql.DataSource;
import java.util.Properties;

/**
 * Created by Yezhiwei on 16/11/20.
 */
@Component
@MapperScan("com.gemantic.*.dao")
public class MybaitsConfig {

    @Autowired
    private Environment env;

    @Bean
    public DataSource getDataSource() throws Exception {
        Properties props = new Properties();
        props.put("driverClassName", env.getProperty("jdbc.driverClassName"));
        props.put("url", env.getProperty("jdbc.url"));
        props.put("username", env.getProperty("jdbc.username"));
        props.put("password", env.getProperty("jdbc.password"));
        return DruidDataSourceFactory.createDataSource(props);
    }

    @Bean
    public SqlSessionFactory sqlSessionFactory(DataSource ds) throws Exception {
        SqlSessionFactoryBean fb = new SqlSessionFactoryBean();
        fb.setDataSource(ds);//指定数据源(这个必须有,否则报错)
        //下边两句仅仅用于*.xml文件,如果整个持久层操作不需要使用到xml文件的话(只用注解就可以搞定),则不加
        fb.setTypeAliasesPackage(env.getProperty("mybatis.typeAliasesPackage"));//指定基包
        fb.setMapperLocations(new PathMatchingResourcePatternResolver().getResources(env.getProperty("mybatis.mapperLocations")));//指定xml文件位置

        return fb.getObject();
    }
}
@Configuration注解(该注解类似于spring的配置文件)@MapperScan注解,指定扫描的mapper接口所在的包- 在该类中,注入了Environment实例,使用该实例可以去读取类路径下
application.properties文件中的内容 - 在该类中,使用druid数据源定义了数据源Bean,Spring Boot默认使用的是tomcat-jdbc数据源,这是Spring Boot官方推荐的数据源(性能和并发性都很好)
- 根据数据源生成
SqlSessionFactory - 值得注意的是,数据源是必须指定的,否则Spring Boot启动不了
typeAliasesPackage和mapperLocations不是必须的,如果整个项目不需要用到*Mapper.xml来写SQL的话(即只用注解就可以搞定),那么不需要配@Primary注解:指定在同一个接口有多个实现类可以注入的时候,默认选择哪一个,而不是让@Autowire注解报错(一般用于多数据源的情况下)
数据库建表SQL
CREATE TABLE `user` (
  `id` bigint(20) NOT NULL AUTO_INCREMENT,
  `user_name` varchar(100) DEFAULT NULL,
  `password` varchar(100) DEFAULT NULL,
  `phone` varchar(100) DEFAULT NULL,
  `locked` tinyint(1) DEFAULT '0',
  PRIMARY KEY (`id`),
  UNIQUE KEY `idx_user_user_name` (`user_name`)
) ENGINE=InnoDB AUTO_INCREMENT=1 DEFAULT CHARSET=utf8;
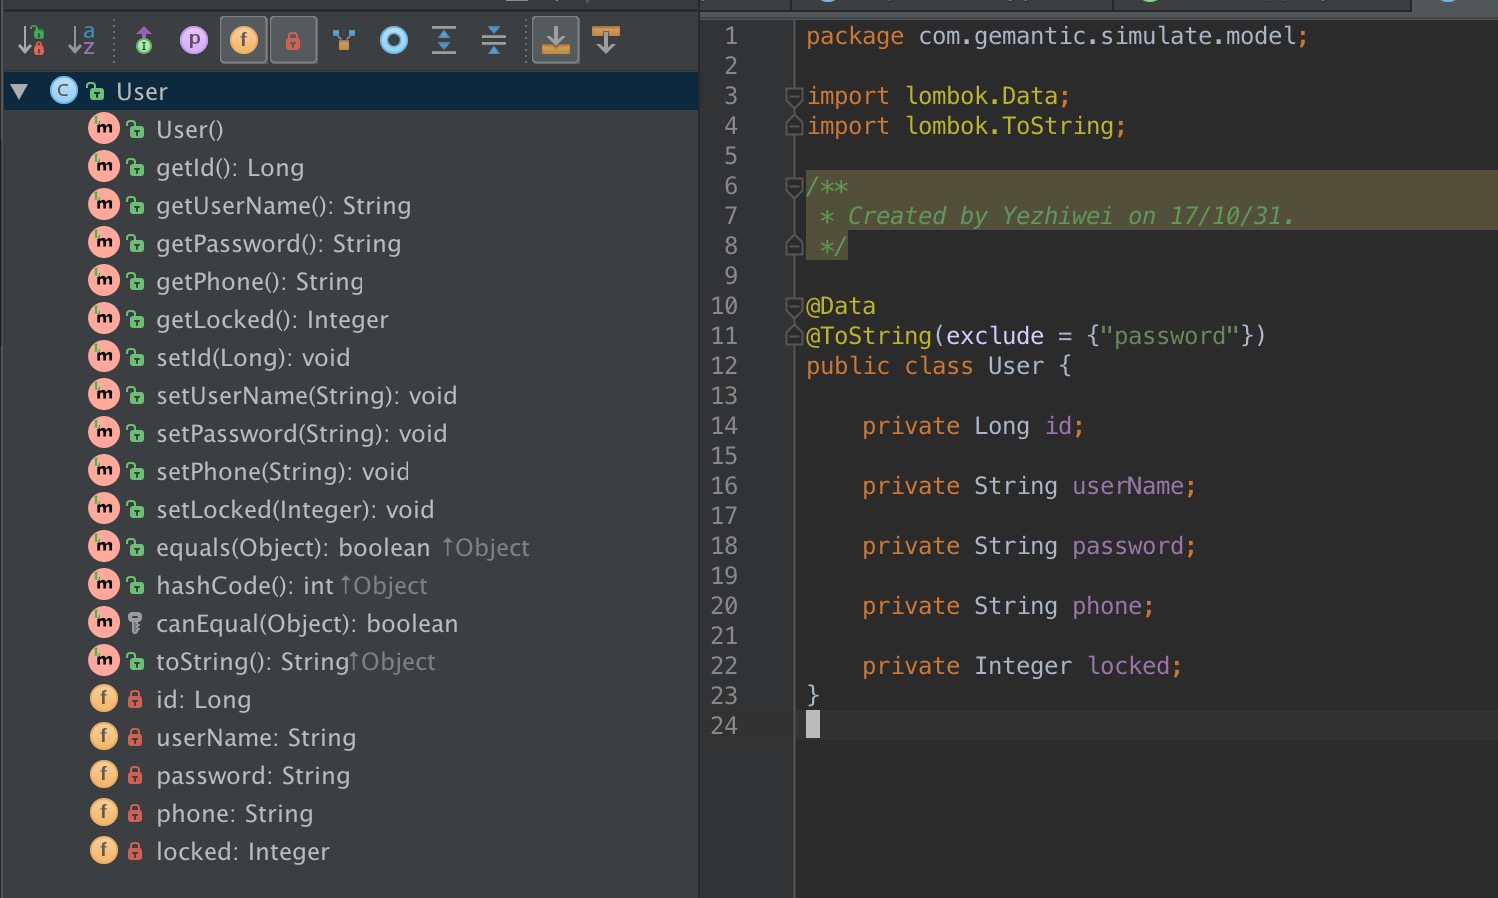
Model
package com.gemantic.simulate.model;

import lombok.Data;
import lombok.ToString;

/**
 * Created by Yezhiwei on 17/10/31.
 */

@Data
@ToString(exclude = {"password"})
public class User {

    private Long id;

    private String userName;

    private String password;

    private String phone;

    private Integer locked;
}
Mapper
package com.gemantic.simulate.dao;

import com.gemantic.simulate.model.User;
import org.apache.ibatis.annotations.Insert;
import org.apache.ibatis.annotations.Param;

/**
 * Created by Yezhiwei on 17/10/31.
 */
public interface UserMapper {

    /**
     *
     * @param userName
     * @param password
     * @param phone
     * @return 返回值为影响的条数
     */
    @Insert("INSERT INTO user(user_name, password, phone) VALUES(#{userName},#{password}, #{phone})")
    int insertUser(@Param("userName") String userName, @Param("password") String password, @Param("phone") String phone);

    /**
     *
     * @param user
     * @return 返回值为影响的条数
     */
    int insertUserWithBackId(User user);
}
两种方式:
- 一个直接用注解搞定
- 一个需要使用xml来搞定
注:两种方式,返回值都是影响数据库变化的数据条数。
UserMapper.xml, 在resources/mapper目录下。
<?xml version="1.0" encoding="UTF-8" ?>
<!DOCTYPE mapper PUBLIC "-//mybatis.org//DTD Mapper 3.0//EN" "http://mybatis.org/dtd/mybatis-3-mapper.dtd" >
<mapper namespace="com.gemantic.simulate.dao.UserMapper" >
<resultMap id="BaseResultMap" type="com.gemantic.simulate.model.User" >
<id column="id" property="id" jdbcType="BIGINT" />
<result column="user_name" property="userName" jdbcType="BIGINT" />
<result column="password" property="password" jdbcType="VARCHAR" />
<result column="phone" property="phone" jdbcType="VARCHAR" />
<result column="locked" property="locked" jdbcType="TINYINT" />
<!--<!–<result column="create_at" property="createAt" jdbcType="BIGINT" />-->
<!--<result column="update_at" property="updateAt" jdbcType="BIGINT" />–>-->
</resultMap>
<sql id="Base_Column_List" >
id, user_name, password, phone, locked
</sql>
<!--<select id="selectByPrimaryKey" resultMap="BaseResultMap" parameterType="java.lang.Long" >-->
<!--select-->
<!--<include refid="Base_Column_List" />-->
<!--from entrust_queue-->
<!--where id = #{id,jdbcType=BIGINT}-->
<!--</select>-->
<insert id="insertUserWithBackId" parameterType="com.gemantic.simulate.model.User" useGeneratedKeys="true" keyProperty="id" >
<![CDATA[
INSERT INTO user
(
user_name,
password,
phone,
locked
)
VALUES
(
#{userName, jdbcType=VARCHAR},
#{password, jdbcType=VARCHAR},
#{phone, jdbcType=VARCHAR},
#{locked, jdbcType=TINYINT}
)
]]>
</insert>
</mapper>
说明:
useGeneratedKeys="true"表示给主键设置自增长keyProperty="id"表示将自增长后的Id赋值给实体类中的id字段。com.gemantic.simulate.model.User"这个属性指向传递的参数实体类
UserDao
package com.gemantic.simulate.dao;

import com.gemantic.simulate.model.User;
import org.springframework.beans.factory.annotation.Autowired;
import org.springframework.stereotype.Repository;

/**
 * Created by Yezhiwei on 17/10/31.
 */

@Repository
public class UserDao {

    @Autowired
    private UserMapper userMapper;

    public int insertUser(String userName, String password, String phone) {
        return userMapper.insertUser(userName, password, phone);
    }

    public int insertUserWithBackId(User user) {
        return userMapper.insertUserWithBackId(user);
    }
}
测试用例
在UserDao类上使用idea的快捷键command shift t,快速生成单元测试

package com.gemantic.simulate.dao;

import com.gemantic.simulate.model.User;
import org.junit.Test;
import org.junit.runner.RunWith;
import org.springframework.beans.factory.annotation.Autowired;
import org.springframework.boot.test.context.SpringBootTest;
import org.springframework.test.context.junit4.SpringJUnit4ClassRunner;

/**
 * Created by Yezhiwei on 17/10/31.
 */

@RunWith(SpringJUnit4ClassRunner.class)
@SpringBootTest
public class UserDaoTest {

    @Autowired
    private UserDao userDao;

    @Test
    public void testInsertUser() throws Exception {
        // 测试逻辑
        int result = userDao.insertUser("Yezhiwei", "123456", "11111227346");
        System.out.println(result);

    }

    @Test
    public void testInsertUserWithBackId() throws Exception {
        // 测试逻辑
        User user = new User();
        user.setUserName("Yess");
        user.setPassword("123");
        user.setPhone("12345678901");
        int result = userDao.insertUserWithBackId(user);
        System.out.println(result);
        // 返回用户ID
        System.out.println(user.getId());
    }
}
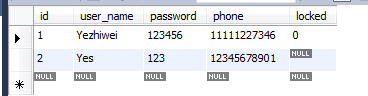
执行测试,数据库结果:
实践
- insert 的另一种写法。
  <insert id="insertUserWithBackId" parameterType="com.gemantic.simulate.model.User" >
  	<selectKey resultType="java.lang.Long" order="AFTER" keyProperty="id">
          SELECT LAST_INSERT_ID()
    </selectKey>
    <![CDATA[
      INSERT INTO user
        (
            user_name,
            password,
            phone,
            locked
        )
        VALUES
        (
            #{userName, jdbcType=VARCHAR},
            #{password, jdbcType=VARCHAR},
            #{phone, jdbcType=VARCHAR},
            #{locked, jdbcType=TINYINT}
        )
    ]]>
  </insert>

* order="AFTER" 表示先执行插入语句,之后再执行查询语句。可被设置为 BEFORE 或 AFTER。
*
* 如果设置为 BEFORE,那么它会首先选择主键,设置 keyProperty 然后执行插入语句。
*
* 如果设置为 AFTER,那么先执行插入语句,然后是 selectKey 元素。
*
* keyProperty="id"  表示将自增长后的Id赋值给实体类中的id字段。
*
* SELECT LAST_INSERT_ID() 表示MySQL语法中查询出刚刚插入的记录自增长Id。
